Yaya's Cafe

The Mix of Stuff Blog

Pumpkin Pie in Two Great Ways October 7, 2013

Filed under: Cake,DIY,Family,Food,recipe,Uncategorized — Yaly @ 1:55 PM
Tags: , , ,

Today was great. I made pumpkin pie and pumpkin pie pops for dessert. They taste awesome.  ^_^

image

For the pumpkin pie I used canned pumpkin and a homemade pie crust. The reason I am excited is because I made the crust from scratch and it is awesome. I usually buy the crust because pumpkin pie is the only pie I bake but today has changed that.

I got the pie crust recipe from  http://www.chow.com/recipes/10746-basic-pie-dough.

Here’s the recipe for homemade pie crust:

WHAT YOU WILL NEED:
1 1/2 Cups of all purpose flour
1 Teaspoon of sugar
1/4 Teaspoon of salt(fine not sea salt)
1 Stick of butter
4-5 Tablespoons of water

WHAT TO DO:
1. Mix the dry ingredients.
2. Cut the butter into small pieces and add to flour. Cut the butter into the flour mix until it is yellowish and pea sized.
3. Add 4 tablespoons of water.* Combine to form a dough ball. Note: * If it is too dry to hold it’s shape add last tablespoon of water.
4. Flatten ball of dough into a disk. Wrap in seran wrap and refrigerate for 30 mins or more.
5. Roll out dough and place in pie pan. Then fill with whatever filling you prefer and bake as directed.

For the pumpkin, I followed the recipe on the can.

Using the same recipe, some cookie cutters, and lollipop sticks you can make pumpkin pie pops.

image

image

For pie pops:
1. Preheat oven to 375 deggrees. Roll out the dough.
2. Cut your mini pie rounds with cookie cutters.
3. Lay out the single pieces leaving room on the cookie sheet for the sticks.
4. Lay lollipop sick on dough and press down lightly. Add a dollop of pie filling.
5. Top with another piece of pie dough and use a lollipop stick to crimp shut. Top with egg wash and pop into oven.
6. Bake until edges are golden brown, about 12 to 15 mins.

It was fun, easy, and delicious. Best part is that anyone can do it. It is kid friendly fun. ^_^ And did I mention it is fun to eat.


Diaper Cake DIY August 28, 2013

Do It Yourself Diaper Cake

What You Will Need:

1. A box of diapers (any brand is fine).
2. Rubber bands at least 6 large ones.
3. Clean round bowls or cake pans in different sizes.
4. Twine or curling ribbon.
5. Decorative ribbon and goodies for baby.
6. Dowel rod.

What To Do:

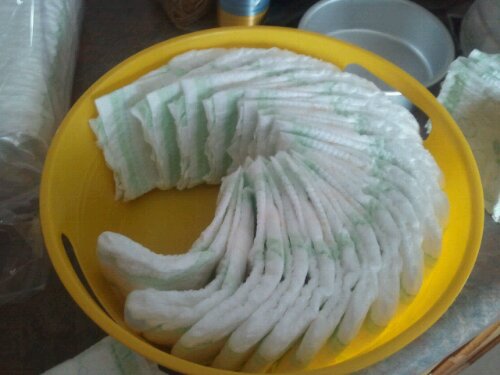
1. Put the diapers in a spiral and form a circle as shown. Use the cake pan to help you keep the shape.
2. Tie with two to three large rubber bands.
3. Repeat with second and third tiers.
4. Tie with curling ribbon.
5. Stack and place dowel rod in the middle.
6. Decorate with wide colorful ribbons and toys, hair accessories and baby goodies.

image

image

image

image

image


The Girl Arrives! June 25, 2013

Filed under: Uncategorized — Yaly @ 6:00 AM
Tags: , , ,

After all the waiting and the planning the girl is nearly ready to be born. She is pushing and shoving as she struggles with the idea and instinct of staying in or getting out. She wants to leave her warm womb apartment and venture into the world; unafraid.

Instead, she waits. She holds on trying to maintain the initial nine month lease, as if that was an option. Not yet realizing that her long awaited arrival refuses to wait any longer.

Try as she might to bide her time, it continues to tick forward mercilessly. And at the end of the day it is for the best. She will arrive to the tears of joy and happiness.

She will meet her mother and cry for the first time as cold air fills her lungs. She will feel the need to be held and hugged. She will experience an abundance of love that will quickly and successfully replace her womb home.

That is the point at which life will sweep her of her feet so she has no reason to look back in regret. It is then, that the girl arrives. A happy, bouncing baby girl.


Homemade Headbands with Button Flowers February 24, 2013

image

Homemade Headbands with Button Flowers

These headbands a super cute and very simple to make. You can customize them with your favorite colors or add some cute details like mini leaves to give them a pop of color and personality. For the ones pictured here all you need are a few simple and low priced materials.

What You Will Need:

image

  • Glue Gun and Glue Sticks
  • Ribbon (in any color(s) you like)*
  • Craft Buttons in two or more colors and sizes**
  • Ruler
  • A package of Clothing Elastic (I will try to include a photo)
  • Toothpick or small object to remove excess glue if  needed
  • Scissors

Note: * The size of the ribbon is 5/8 of an inch. You can use a wider ribbon in you like but I prefer a middle of the road option.

Note: ** The buttons can also be all the same for the flower petals and different in the center. It is based on your preferences.

What To Do:

  1. Measure out 12 inches of ribbon (in either color) and 1 inch of the elastic. Cut it and set it aside. This size is for newborn to three months.
  2. Measure out 14 inches of ribbon and two of elastic. Cut it and set it aside. This will fit most 3+ babies. Depending on how much your child grows it may even last until they are about a year old.
  3. Grab 4 large buttons and make a square. You can use one color or two for this part. These 4 buttons will make up the petals.
  4. Grab 1 large button and place on top of the square. Make sure it is centered. You can use the same color as the other buttons but I think it looks more like a flower if you use a different color for the center. NOTE: I topped mine off with a small button on top of the large one for a bit more color and depth. This is not necessary. It just depends on what you like.
  5. Once you have established the color pattern you like, glue the buttons together. To do this I took my center button and added a circle of glue around its outer edge. You don’t really need glue in the middle since your buttons will not reach that far in. Glue smaller button on (if you are using it). You may need the toothpick to remove any excess glue.
  6. NOTE: Your other option is to glue the petals together by gluing the edges. Then adding the center. (I prefer the first one. ) This method takes a lot of time and experience. You will need to work fast and be able to wipe off a glue as you put the petals together.
  7. Cut 2 pieces of green ribbon. You need about an inch each. Cut the edge at an angle to give it a sharp point.
  8. Grab your ribbon pieces and place on the one you like best. I made two versions of the headbands: One with “leaves” and one without. See which way you prefer it.
  9. Once you are ready, glue the leaves on the ribbon. I made an upside down “V” and used a tiny dab of glue. One thing to keep in mind is the placement of the button flower. I placed mine off to the side.
  10. Then glue your button flower on top of the leaves or straight onto the ribbon. Let it dry. It will do so quickly.
  11. Add a line of glue to the elastic. Stick to the ribbon. Make sure it is centered for the best results. Do the same to the other side to complete the circle. Check the ribbon and make sure it is all facing up.
  12. Let it dry for a 5 minutes. It will dry sooner than that but giving it five minutes will allow you to smooth out any bits of glue and to remove the excess. Now you are ready to go out and show off your headbands!

TIPS:

  • Pick up the headband and hang it upside down before use. If the flower buckles or does not seem to sit still on the ribbon, add a bit of glue to the ribbon to secure the petals.
  • Use your thumb to press down and smooth out the pieces as you glue them on.
  • Pay attention to the amount of glue you are using. A dab will usually be enough. Anymore will cause big globs of excess glue, which you will have to remove. In some cases you even have to start over because it is too much.
  • If you are having too much trouble gluing the buttons, scrape off the glue and start over. You may have used too much glue or not enough.

image

Try them and let me know how you like them in the comments section. Enjoy!

Thank you for reading!!


Geek It To Me December 31, 2012

I love goofing off and enjoying family time. But every once in a while I have to have geeky project time or a nerdy night. The point is I find myself in need of a great project to motivate me and get my creative juices flowing.

In trying to come up with an idea, it occured to me that I have never really looked at pinterest. I don’t have an account and I don’t care to “pin” anything. I mean, I have seen entries on pinterest because of stumble upon and google searches where the images mostly come from pinterest. But I have not personally gone to pinterest to seek or search for anything.

Today, I said to hell with it and did my best to find something. Here’s what I came up with as far as search ideas: Baby showers, food and DIY

With that I set off to google. I quickly decided to search for Baby Shower DIY. I found lots of printing and label making as well as diaper cakes (which I plan to make). Then I hit on a dollar store crafts pinterest page. It was awesome.

This person put together some great tips and ideas. I loved it.

You can check it out at:

So here is my version of a cool project for making your own apothecary jars – MODIFIED

image

Now it doesn’t look like much but it will be awesome once it is done. Trust me. You will be happy. ^_^

What You Will Need:
2 Candle holders
1 Vase (I like the rounded ones)
Fix it all super glue
Some anti-scuff circles (the kind you put on furniture legs to keep it from damaging the floor)

What To Do:

1. Stack your vase on the candle holder. See if you love the look because once you glue it, you get what you put together.
2. Place an anti-scuff circle on the top of the candle holder where the vase and candle holder meet.
3. Then place one on the center of the vase. Make sure to stick it on the candle holder and vase really well.
4. Put some fix it all glue on the anti-scuff circle. It needs to cover the circle completely.
5. Affix the vase to the candle holder by making both anti-scuff circles meet.
6. Press down and clean up excess glue. Do this carefully so nothing extra sticks to your jar.
7. Carefully weigh your jar down and set aside to cure (harden). I let mine harden overnight. I used a coke can and some regular cans on top of that. Be really careful not to drop things in because you will break or chip the jar.

image

8. Once it is cured, place the other candle holder on top to act like a lid.
image

Fill and enjoy. I filled mine with some light purple meringues and added some tissue paper on top for a cutesy look. It is a simple jar dressed up like a ballerina.

For more projects go to http://pinterest.com/heathermann1/dollar-store-crafts/

I hope everyone has a Happy New Year!!

Thanks for reading!!


Doughnut Holes December 18, 2012

Filed under: Food,recipe,Uncategorized — Yaly @ 1:27 PM
Tags: ,

image

Glorious, golden cinnamon sugar doughnut holes!

Now, these cuties are a simple and quick “homemade” alternative to store bought doughnut holes.

Cinnamon Sugar Doughnut Holes

What You’ll Need:

  • Can of Homestyle Buttermilk Biscuits
  • Ground Cinnamon
  • Light Brown Sugar
  • Canola or Peanut Oil  (Not pictured below)

image

What To Do:

  1. Mix about 1/4 cup of Light Brown Sugar and about Half 1/4 of cup of Cinnamon. Most people like to do equal parts but I prefer adding the cinnamon to taste. If you want a more cinnamony flavor mix a full 1/4 cup of each.

image

2. Preheat deep fryer. If you are using a small pot like I did here, fill it with about 2 inches of oil. It does not take long to get hot, so I suggest preheating on medium to medium high and keeping a close eye on your oil. Took me about 4-5 mins on medium high. Sometimes it will take less time or a little more.

image

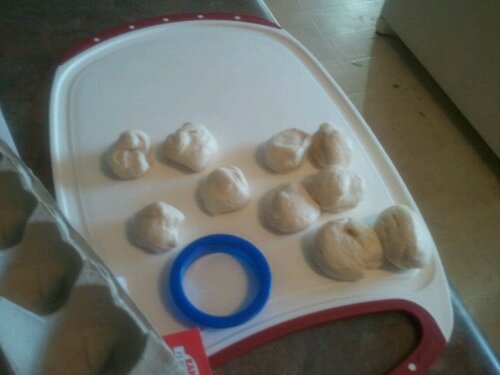
3. Separate the biscuits into however many come in your can of biscuits. In this case, eight biscuits. Then grab a round cookie cutter (or any shape you like). Cut into several small pieces. If you want traditional holes, roll the biscuit in your hand to form balls. If not, leave in whatever form you prefer. I have tried stars before and they look like pointy doughnut holes. ^_^

Good to eat, either way.

image

4.  Turn temperature down to medium. Drop in oil and fry until golden brown. Have a fork or spatula ready to turn each doughnut so it is golden brown on both sides. Takes about 45 seconds to 1 minute per side to get nice and golden.

5. Remove and place on a plate with a paper towel or an empty egg carton like I have here. Make sure you let most of the oil run off before removing.  Let cool for 30 seconds before rolling in cinnamon sugar mix.

image

6. Roll in cinnamon sugar mix until lightly coated. If you want a better coat you can put the doughnut holes in the sugar mix right after  you remove them from the oil.

image

Eat and Enjoy!! Personally, I like mine late at night with a little Coquito but Milk also works.

Thanks for reading!


A Quick Photo Update December 17, 2012

Filed under: Cake,Food,Holiday,Uncategorized,Updates — Yaly @ 8:30 PM
Tags: , , , , ,

Cupcake on Day 2!

image

Had some tea and decided to grab a red cupcake. ^_^

image

No filling but look at how fluffy it is. I put them in the refrigerator and it taste so good. Better the next day.

Have a good night!


Cupcake Jars! December 16, 2012

Filed under: Cake,Family,Food,Holiday,recipe,Uncategorized — Yaly @ 7:37 PM
Tags: , , , ,

‘Tis the season to be jolly  and enjoy the yummy goodness that a cupcake can bring. So here’s to the holidays and festive but always yummy treats.

image

These are the some of the colorful cupcakes I made today. They are a little messy and covered in chocolate butter cream, which is my way of saying they are delicious. ^_^

Besides these cuties. I also made some like this.

image

Very festive, right. Now, that you’ve seen them I’m sure you want to know how I threw them together. Well, here’s a quick how to.  ^_^

What You Will Need

  • 1 Box of White Cake Mix (Made from scratch is fine too)
  • Food Coloring (Liquid or Gel is fine)
  • Chocolate Butter Cream (any flavor you like would work)
  • Jam or Jelly Jars

What To Do

  1. Mix the White Cake Mix as directed or put together your favorite white cake recipe. I used a box mix because it was faster and I really wanted some cupcakes. ^_^ Either one is yummy.
  2. Then the divide the batter into several bowls. I divided mine into five bowls but you are welcome to do more or less. Just try to divide it evenly between however many bowls.
  3.  Add the food coloring gel and make the colors you want.  I made blue, red, green, yellow and orange.  (Most food coloring packages have basic color guidelines if you need to mix more complex color combos like Teal, which I didn’t make today but I still love.)
  4. Preheat your oven as instructed by your recipe.
  5. Line cupcake pans without mixing the colors. If you mix them, you can make marble effects and that type of thing but this works best in solid colors.
  6. Bake!
  7. Let cook on wire rack.
  8. Remove wrappers from five cupcakes, one of each color. Cut into two rounds.
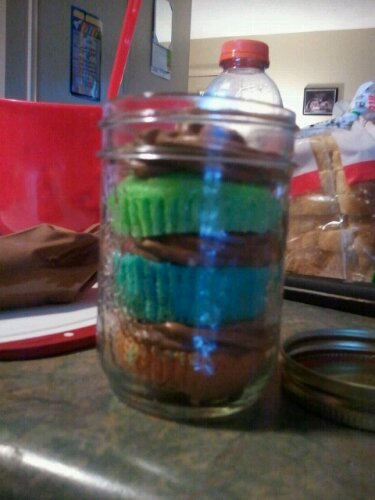
  9. Drop the bottom of one color into the jar. Top with butter cream. Add another piece in a different color. Top with more butter cream. Then place the top of a cupcake on top and add a nice swirl of butter cream. Mix and match however you like.
  10. Once you run out of pieces you can cut more cupcakes and put them in the jars or just top the whole cupcakes. I did both. Some were for now and the rest for later.
  11. Eat!!

Enjoy now or put a lid on them and refrigerate for later. Either way is yummy. They can be stored in the fridge for up to three days with a lid.

Here are some photos of the steps:

image

image

image

image

image

I hope you enjoy this fun treat. I sure did. My favorite part is that this idea can translate to just about any kind of party, activity and or holiday.  ^_^

Thank you for reading!!


Decorating A Basic White Dessert Stand June 22, 2012

Filed under: Birthday,Cake,Candy,Food,Party,Uncategorized — Yaly @ 9:05 AM
Tags: , ,

As you may or may not know Summer is Birthday season, especially in my house. Currently, there are only two full on Summer birthdays but they are 4 days apart. Two out of four is quite exciting since there is only one child in that mix. ^_^

This year I decided to make Birthday Cupcakes. When I looked around the web I found a ton of fun ideas for stacking and showcasing cupcakes. The problem is that I am a stay at home mom with an active and helpful toddler. That means, I don’t have hours and hours to wrap a ton of tiny boxes with wrapping paper or tissue paper. I love the idea of showcasing my hard work but I don’t think I should work three to four times as hard to do it.

Here is what I came up with to showcase cupcakes without adding a lot more work to my plate.

What You’ll Need:
-Basic Plastic Cake Stand (reusable is better)
-Gluestick
-Ribbon in Two different colors and widths (it is best to use the same colors scheme as your party)

image

Basic Cupcake Stand

The ribbons I used:
image

Directions:

1. Set up the cake stand. This will make everything easier.
2. Measure the ribbon. What I did was just put a little bit of glue on the end of the ribbon and glued it to the stand. Then I went all the way around the first section. I gave myself some wiggle room by adding half an inch to overlap. Then I pulled it off the stand to cut.
3. Cut the ribbon. Measure the second ribbon by laying it on top of the first and making each end meet. Once both ribbons are cut you are ready to begin. (You can measure and cut the ribbon for each layer before going on to the next step. For some people it is easier to do it one by one. Do what you prefer.)
4. Take the gluestick and cover the underside of the skinnier ribbon.
5. Place the skinnier ribbon in the center of the wider ribbon and press. This will give you a simple but elegant look.

image

Ribbons glued together

6. Let it dry (it won’t take long).
7. Add glue to top half of the back of the wider ribbon. The top half works better for the cupcake stand I have but you can always add more if you want. I just think letting the bottom half hang looks nice.
8. Glue the edge to the stand and press.
9. Slowly go around the edge and press ribbon to glue it on. You may need a little extra glue depending on how quickly you do it. Make sure the ribbon meets the top edge of the stand for consistency.
10. Once you have gone all the way around add a little bit of extra glue to end where it will overlap and press. This will help it stick a lot better. Holding this area for a few seconds sticks it together better. You can also use a clothespin or something similar to clip it.
11. Repeat steps 7-10 to finish decorating the stand.
12. Add cupcakes or other desserts and enjoy!

image

Finished!


The finished product is simple with sleek and elegant accents. This little touch can go a long way to personalizing the dessert/cupcake stand for your event. The other great thing is that once you are done if you want to use it for another event it is easy to change the colors. Just pull off the ribbon, wash well (paying particular attention to the area where you glued the ribbon) and dry. Then you are ready to decorate it again.

The other great thing is that you can get as creative as you want. The basic design is a perfect base for a lot of different styles so get creative and have fun.

Thanks for reading! ^_^


Winners! December 12, 2011

Filed under: Contest,Family,Holiday,News,Uncategorized,Updates — Yaly @ 10:19 PM
Tags: , , , , ,

The Holiday Cheer Contest has ended! Now, it’s time to name the WINNERS! It’s been very exciting and lots of fun coming up with ways to teach my son. This is by far the best way I have found to teach my son about kindness and sharing; simply by doing. Thank you all for your participation and interest. Especially those who read about the contest and spread the word. Hopefully, next year I can offer a few more contests.

This experience has been amazing and I hope all of you have been inspired!

Now onto the WINNERS:

.

.

.

.

.

.

.

.

\/

SARAH  SAVICKAS

and

ABIGAIL  KENNEDY